Monitor Cameras with TDSEE App: Installation, Setup & Tips
In the modern world, security is a top priority for homeowners, businesses, and anyone seeking peace of mind. Video surveillance systems offer a reliable way to monitor your property and enhance security, but managing multiple devices and cameras can be complicated without the right tools. That’s where the TDSEE App comes in. This versatile app allows users to easily set up and monitor cameras, manage smart devices, and receive alerts, all from the convenience of their smartphone or tablet.
In this comprehensive guide, we will walk you through everything you need to know about setting up and monitoring cameras using the TDSEE app, including how to add devices, manage settings, view live feeds, and receive alerts. Whether you're using it for home security or business surveillance, this guide will help you make the most of the TDSEE app to monitor your property effectively.
What is the TDSEE App?
Before diving into the details of camera setup and monitoring, let's first understand what the TDSEE app offers. TDSEE is an all-in-one surveillance app that allows users to manage security devices, monitor real-time video feeds, control smart devices, and receive notifications. Some of the key features of the app include:
Live video monitoring from multiple cameras simultaneously
Motion detection and smart tracking
Two-way audio for communication with people near the cameras
Instant alarm notifications triggered by unusual movement or events
Cloud storage to securely store footage
Device management for controlling smart locks, lights, and alarms
With its user-friendly interface and robust functionality, TDSEE makes it easy to manage your security system and keep an eye on what’s happening in real time.
How to Set Up Cameras Using TDSEE App?
Getting your cameras set up with the TDSEE app is a straightforward process. Here’s how to do it step by step:
Step 1: Download the TDSEE App
Before you can set up your cameras, you'll need to install the TDSEE app on your smartphone or tablet.
For Android: Visit the Google Play Store, search for "TDSEE," and tap the Install button.
For iOS: Visit the App Store, search for "TDSEE," and tap the Get button.
Once installed, open the app and sign up for an account or log in if you already have one.
Step 2: Add Your Cameras to the TDSEE App
The next step is to add your cameras to the TDSEE app so that you can begin monitoring them.
Open the TDSEE App: Once you’re logged in, you’ll be taken to the main dashboard of the app.
Go to Device Management: Tap on the “Add Device” button or navigate to the device management section from the main menu.
Select Your Camera Type: Choose the type of camera you want to set up. TDSEE supports a wide range of security cameras, from indoor to outdoor models, including wireless and wired cameras.
Connect the Camera:
For wireless cameras, ensure that both your camera and your phone are connected to the same Wi-Fi network.
For wired cameras, follow the setup instructions that came with your camera to ensure it is connected to the app.
Scan QR Code or Enter Credentials: Some cameras will require you to scan a QR code that is either printed on the camera or included in the manual. Others may require you to enter the camera’s Wi-Fi credentials.
Finalize Setup: After the camera is successfully added, the app will show you a live feed or a connection status indicator. This means your camera is now linked to the TDSEE app, and you can start using it.
Step 3: Position and Install Your Camera
After successfully adding your camera to the TDSEE app, it’s time to position it in the optimal location for monitoring.
Indoor Cameras: Position your indoor cameras where they have a clear view of the area you want to monitor, such as entrances, hallways, or rooms with valuable items.
Outdoor Cameras: Ensure that your outdoor cameras are positioned in weather-resistant locations, away from direct sunlight, and within range of your Wi-Fi router.
Height and Angles: Install cameras at a height that prevents tampering while ensuring they cover the desired areas. Adjust the camera’s angle to monitor doorways, driveways, or other high-risk areas.
Once your cameras are properly positioned, make sure they are securely mounted according to the manufacturer’s instructions.
How to Monitor Cameras Using the TDSEE App?
Once your cameras are set up, it’s time to start monitoring them through the TDSEE app. Here’s how to view live footage, manage recordings, and receive alerts.
Step 1: View Live Video Feeds
The TDSEE app allows you to view live video feeds from your cameras at any time. Here's how:
Open the TDSEE App: On your smartphone or tablet, open the app and log in.
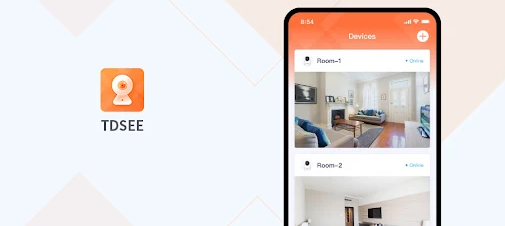
Go to the Camera Feed Section: From the app’s main dashboard, select the camera feed you wish to view.
Choose the Camera: Tap on the camera you want to monitor. If you have multiple cameras set up, you can toggle between them easily by selecting the relevant camera from the list.
Watch the Live Feed: The live video feed will load, and you can begin monitoring your property in real-time. You can zoom in, pan across the view, or adjust the camera angle (if the camera supports it) to get a better look at certain areas.
You can also adjust the video resolution settings to fit your needs, depending on your internet speed and viewing preferences.
Step 2: Two-Way Audio for Communication
Many TDSEE-compatible cameras come with built-in two-way audio functionality, which allows you to communicate with people through the camera. This feature is especially useful for speaking with delivery drivers, visitors, or intruders.
Activate Two-Way Audio: When viewing the live feed, tap the microphone icon to enable two-way audio.
Listen and Speak: You can now hear audio from the camera's microphone and speak into your phone to communicate with anyone in the camera’s vicinity.
Step 3: Playback Recorded Footage
TDSEE also allows you to review past footage, which is essential for reviewing incidents or tracking activity over a period of time.
Go to Playback Mode: From the main dashboard, tap on the Timeline or Video History option.
Select the Date and Time: Choose the specific date and time range you want to view. The app will show you all recorded footage from that time period.
Review the Footage: Tap on any clip to view it. You can pause, rewind, or fast forward through the video as needed.
Step 4: Receive Notifications
One of the most powerful features of the TDSEE app is the ability to receive instant notifications whenever motion is detected by your cameras. Here's how to set up and manage these alerts:
Enable Motion Detection Alerts: In the app’s settings menu, enable the motion detection feature for the cameras you want to receive alerts from.
Set Sensitivity: Adjust the sensitivity of the motion detection. You can set it to high, medium, or low, depending on how much movement you want to be alerted to.
Notification Preferences: Choose how you want to receive notifications. You can opt for push notifications, email alerts, or even SMS alerts depending on your preferences.
Manage Alerts: If you find the notifications too frequent, adjust the camera’s sensitivity or set schedules to only receive alerts during specific times of day.
Advanced Features for Camera Management
The TDSEE app provides several advanced features for managing your cameras and ensuring that your security system works optimally.
1. Smart Tracking
For certain camera models, the TDSEE app supports smart tracking, which automatically tracks movement within the camera’s field of view. This is particularly useful for surveillance in high-traffic areas where you want to keep the camera focused on moving objects or people.
Activate Smart Tracking: In the camera settings, toggle the smart tracking feature on. The camera will then automatically adjust its focus to track movement in its field of view.
2. Cloud Storage
TDSEE offers cloud storage options to save recorded footage securely. This ensures that even if your camera’s SD card is damaged or tampered with, your footage remains safe in the cloud.
Set Up Cloud Storage: Go to the app's settings and link your cloud storage account to the TDSEE app. Choose the type of footage you want to upload and the storage duration.
Access Footage Anytime: Once your footage is uploaded to the cloud, you can access it from anywhere, anytime, even if your local storage is full.
3. Scheduling
With the scheduling feature, you can automate your camera’s recording times. This is useful for monitoring during specific hours or ensuring that the cameras are recording during off-hours.
Set Up Schedules: In the camera settings, choose time intervals during which you want your camera to record. You can set different schedules for different days of the week.
Troubleshooting Common Issues
While the TDSEE app is designed to be easy to use, you may run into some issues along the way. Here are some common problems and their solutions:
1. Camera Not Connecting
Solution: Make sure that both your camera and mobile device are connected to the same Wi-Fi network. Restart the camera and the app if necessary.
2. Lagging or Poor Video Quality
Solution: Check your internet connection. Lower the video resolution settings if needed, or switch to a wired connection if using a wireless setup.
3. App Crashing
Solution: Ensure that the app is updated to the latest version. Restart the app or reinstall it if it continues to crash.
Conclusion
Setting up and monitoring cameras using the TDSEE app is an easy and efficient way to enhance the security of your home or business. With its intuitive interface, real-time monitoring, advanced features like smart tracking, and customizable alerts, TDSEE offers a comprehensive solution for managing your surveillance system.
By following the steps in this guide, you can set up your cameras, view live feeds, manage recordings, and ensure your property is secure at all times. Whether you are at home, at work, or on the go, the TDSEE app gives you peace of mind by putting security at your fingertips.
Trending Now
Updates